IOS底层- Clang插件研究
前言
一、LLVM源码部署流程
二、Clang插件编写前的配置
三、Clang插件编写
四、开始解析代码
五、Xcode集成自定义插件
经过对LLVM的总结,了解了整个编译原理和过程,同时明确了学习LLVM前端编译器Clang相关知识点,是对IOS开发比较有价值的,所以继续探索一下Clang插件开发。
一、LLVM源码部署流程
由于之前使用的清华镜像有报错,所以更新一下新的流程:
LLVM官网 : https://llvm.org/docs/GettingStarted.html#getting-started-with-llvm
1、下载LLVM
直接clone github上的版本:
git clone https://github.com/llvm/llvm-project.git
clone下来大概 3.5G左右,clone下来之后目录如下:
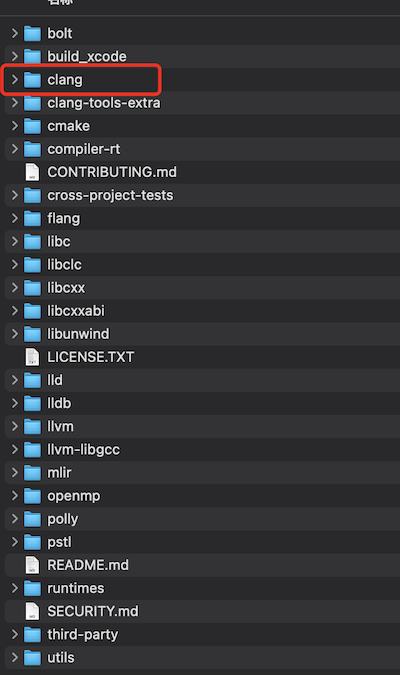
可以看到,和之前清华镜像对比来说,方便了很多,不用再去下载 Clang和compiler-rt等。
2、安装cmake
cmake是什么呢?CMake是一个跨平台的编译(Build)工具,可以用简单的语句来描述所有平台的编译过程。
(1)先检查mac是否已安装cmake工具:
cmake --version
如果未安装,会提示:command not found:cmake
(2)通过brew来安装cmake,这个网上一堆教程,不记录了。
brew install cmake
3、增加clang scheme:
(1)将llvm-project目录下的clang文件夹拷贝到llvm目录下。
(2)打开llvm目录下的CMakeLists.txt文件,增加add_subdirectory(clang)。

4、通过cmake编译Xcode项目
cd llvm-project
mkdir build_xcode
cd build_xcode
cmake -G Xcode ../llvm
如果此时报错:
/Library/Developer/CommandLineTools/SDKs/MacOSX.sdk
because the directory does not exist.
CommandlineTools找不到,装一下:
xcode-select --install
编译完成后,cmake工具会帮我们在llvm-project目录下的 build_xcode 目录下生成包含 clang 和 clangTooling scheme 的llvm Xcode工程。
5、在build_xcode打开llvm工程,会有提示如下:
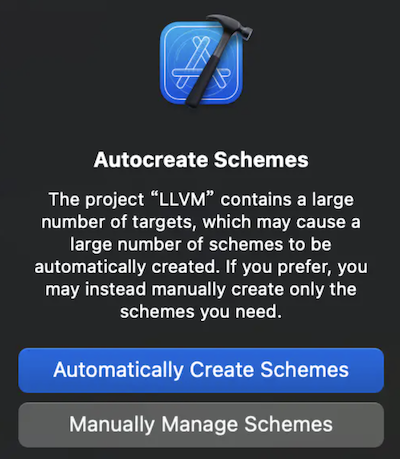
如果直接选择自动创建scheme会拖累Xcode的速度,但是根据电脑性能来定。
6、选择clang和clangTooling的scheme进行编译,编译的时间比较长(取决于机器的性能),编译完之后,在 llvm-project -> build_xcode -> Debug -> bin 目录下会出现clang的可执行文件。
此时clang 文件编译就结束了。
二、Clang插件编写前的配置
1、插件的位置:
llvm-project/llvm/clang/tools/xxx插件

2、添加插件
- 在lvm-project/llvm/clang/tools/ 目录下,添加一个插件文件夹: MGPlugin
- 在同目录下的CMakeLists.txt文件中最后添加:
add_clang_subdirectory(MGPlugin)
- 在MGPlugin中添加MGPlugin.cpp和CMakeLists.txt,CMakeLists.txt内容如下:
add_llvm_library (MGPlugin MODULE BUILDTREE_ONLY MGPlugin.cpp)
3、通过cmake再编译一遍
cd build_xcode
cmake -G Xcode ../llvm
注意:只要修改了cmake的配置,那就需要重新编译。
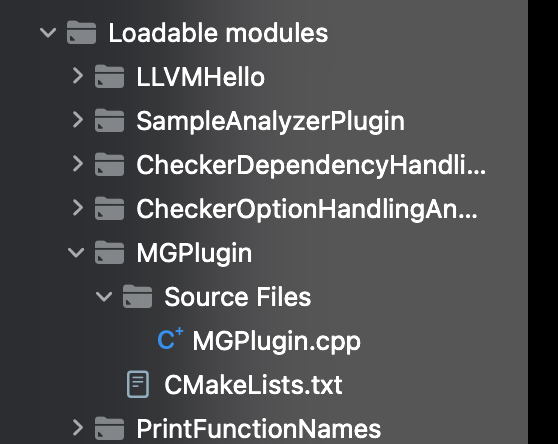
4、重新进入Xcode工程,此时就会出现MGPlugin文件夹
5、创建对应MGPlugin的scheme
三、Clang插件编写
首先要知道:Clang插件的原理就是,重载Clang编译过程的函数。
下面分步骤编写:
1、添加头文件和命名空间
#include <iostream>
#include "clang/AST/AST.h"
#include "clang/AST/DeclObjC.h"
#include "clang/AST/ASTConsumer.h"
#include "clang/ASTMatchers/ASTMatchers.h"
#include "clang/ASTMatchers/ASTMatchFinder.h"
#include "clang/Frontend/CompilerInstance.h"
#include "clang/Frontend/FrontendPluginRegistry.h" //Registry注册

using namespace clang;
using namespace std;
using namespace llvm;
using namespace clang::ast_matchers;
2、插件实现
namespace MGPlugin {

    //创建自定义的ASTConsumer  Consumer(消费者)
    class MGConsumer:public ASTConsumer {
    public:
        //解析完顶级节点的回调
        //解析完一个顶级的声明就回调一次
        bool HandleTopLevelDecl(DeclGroupRef D) override {
            cout << "正在解析..." << endl;
            return true;
        }

        //解析完一个文件的回调
        //整个文件都解析完成的回调
        void HandleTranslationUnit(ASTContext &Ctx) override {
            cout << "文件解析完毕" << endl;
        }
    };

    //继承PluginASTAction 实现我们自定义的Action
    class MGASTAction:public PluginASTAction {
    public:


        bool ParseArgs(const CompilerInstance &CI, const std::vector<std::string> &arg) override {
            return true;
        }


        unique_ptr<ASTConsumer> CreateASTConsumer(CompilerInstance &CI, StringRef InFile) override {

            return unique_ptr<ASTConsumer>(new ASTConsumer);
        }
    };

}

/*
 注册插件
 第一个参数是插件名称
 第二个参数是参加的描述
 */
static FrontendPluginRegistry::Add<MGPlugin::MGASTAction>MG("MGPlugin","测试插件");
- (1)继承PluginASTAction,实现我们自定义的Action
- (2)创建自定义的ASTConsumer ,Consumer(消费者)
此时先build一下,在llvm-project/build_xcode/Debug/lib 目录下,会生成MGPlugin.dylib。
3、插件测试
首先先写一个c文件: hello.c
int sum(int a);
int a;
int sum(int a){
    int b = 10;
    return 10 + b;
}
int sum2(int a,int b){
    int c = 10;
    return a + b + c;
}
然后用刚才编译完的clang来进行测试,测试命令如下:
自己编译的clang文件路径 -isysroot /Applications/Xcode.app/Contents/Developer/Platforms/iPhoneSimulator.platform/Developer/SDKs/iPhoneSimulator16.0.sdk/ -Xclang -load -Xlang 插件(.dylib)路径 -Xclang -add-plugin -Xclang 插件名 -c 源码路径
完整命令:
/llvm_project/llvm-project/build_xcode/Debug/bin/clang -isysroot /Applications/Xcode.app/Contents/Developer/Platforms/iPhoneSimulator.platform/Developer/SDKs/iPhoneSimulator16.0.sdk/ -Xclang -load -Xclang /llvm-project/build_xcode/Debug/lib/MGPlugin.dylib -Xclang -add-plugin -Xclang MGPlugin -c hello.c
此时会打印:
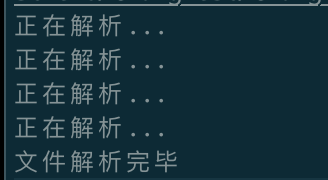
可以看到:解析了4个顶级节点。
四、开始解析代码
1、插件的目标
创建测试工程:
#import "ViewController.h"

@interface ViewController ()

@property (nonatomic, strong) NSString *mgName;

@end

@implementation ViewController

- (void)viewDidLoad {
    [super viewDidLoad];
}

@end
目标是要解析到 @property (nonatomic, strong) NSString *mgName;
判断如果是strong,提示建议用copy。
2、先看下ViewController的抽象语法树
clang -isysroot /Applications/Xcode.app/Contents/Developer/Platforms/iPhoneSimulator.platform/Developer/SDKs/iPhoneSimulator16.0.sdk/ -fmodules -fsyntax-only -Xclang -ast-dump ViewController.m
语法树如下:
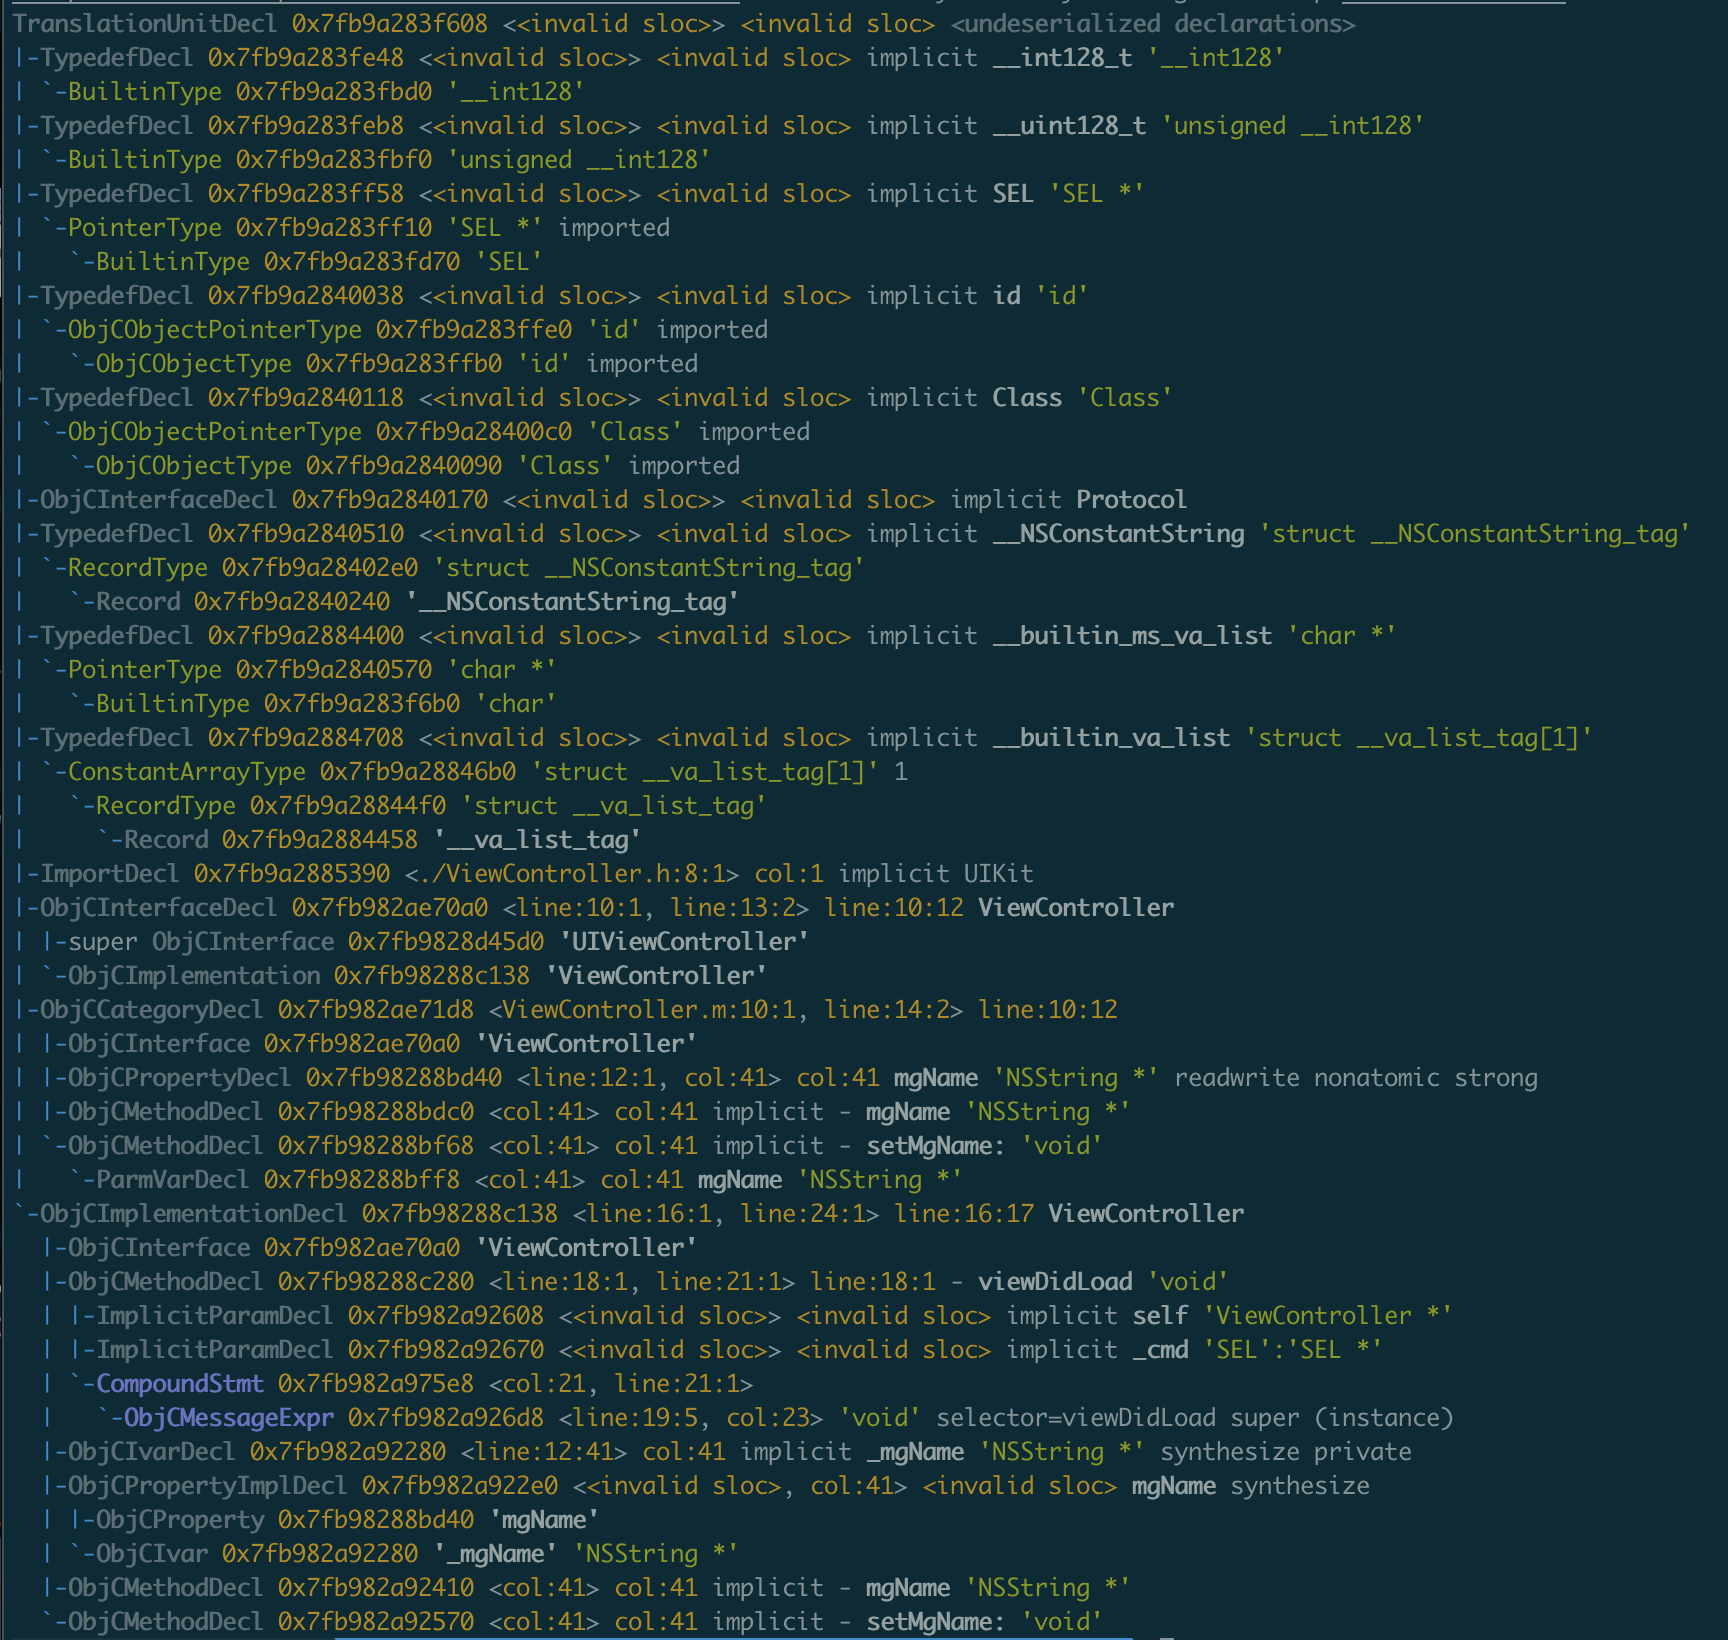
3、节点分析
主要节点如下:
ObjCPropertyDecl 0x7fb98288bd40 <line:12:1, col:41> col:41 mgName 'NSString *' readwrite nonatomic strong
ObjCPropertyDecl 表示Objc的属性节点,所以我们在解析的时候需要过滤到这个节点。
4、绑定ObjCPropertyDecl节点
优化插件代码如下:
namespace MGPlugin {

    static string TAG = "ObjCPropertyDecl";

    //回调
    class MGMatchCallback: public MatchFinder::MatchCallback {
        void run(const MatchFinder::MatchResult &Result) override {
            //通过Result获取到节点
            const ObjCPropertyDecl * propertyDecl = Result.Nodes.getNodeAs<ObjCPropertyDecl>(TAG);
            if (propertyDecl) {
                string typeStr = propertyDecl->getType().getAsString();
                cout << "-- 获取到了: " << typeStr << endl;
            }
        }
    };

    //创建自定义的ASTConsumer  Consumer(消费者)
    class MGConsumer:public ASTConsumer {
    private:
        //ast节点的查找过滤器
        MatchFinder matcher;
        //回调
        MGMatchCallback callback;
    public:

        MGConsumer() {
            //添加一个MatchFinder
            //绑定ObjCPropertyDecl节点
            //回调在MGMatchCallback里
            matcher.addMatcher(objcPropertyDecl().bind(TAG), &callback);
        }

        //解析完顶级节点的回调
        //解析完一个顶级的声明就回调一次
        bool HandleTopLevelDecl(DeclGroupRef D) override {
//            cout << "正在解析..." << endl;
            //注意:解析一个节点,matcher就绑定一个
            return true;
        }

        //解析完一个文件的回调
        //整个文件都解析完成的回调
        void HandleTranslationUnit(ASTContext &Ctx) override {
            cout << "文件解析完毕" << endl;
            //解析完毕,将上下文给matcher
            matcher.matchAST(Ctx);
        }
    };

    //==插件入口==
    //继承PluginASTAction 实现我们自定义的Action
    class MGASTAction:public PluginASTAction {
    public:


        bool ParseArgs(const CompilerInstance &CI, const std::vector<std::string> &arg) override {
            return true;
        }


        unique_ptr<ASTConsumer> CreateASTConsumer(CompilerInstance &CI, StringRef InFile) override {

            return unique_ptr<MGConsumer>(new MGConsumer);
        }
    };

}

/*
 注册插件
 第一个参数是插件名称
 第二个参数是参加的描述
 */
static FrontendPluginRegistry::Add<MGPlugin::MGASTAction>MG("MGPlugin","测试插件");
- 在MGConsumer初始化的时候,通过MatchFinder添加节点绑定和回调
- matcher.addMatcher(objcPropertyDecl().bind(TAG), &callback); 将objcPropertyDecl节点绑定在Tag上,后面也是通过Tag来取绑定的节点信息
- 当文件解析完毕之后,通过matcher.matchAST(Ctx); 将上下文传给matcher
- 最终会通过MGMatchCallback的run方法回调
注意:正在解析的时候,没有必要去获取节点信息(也就是没必要做耗时操作)。
可以看到终端打印:
4、过滤系统文件
通过上面的打印,可以看到有很多系统类的属性,为了方便调试,我们需要将系统类的属性过滤掉。
由于需要过滤系统文件,那么就需要CompilerInstance(编译器事例)来操作。
继续优化插件代码:
namespace MGPlugin {

    static string TAG = "ObjCPropertyDecl";

    //回调
    class MGMatchCallback: public MatchFinder::MatchCallback {

    private:
        CompilerInstance &CI;

        bool isUserSourceCode(const string fileName) {
            if (fileName.empty()) return false;
            //非xcode中的源码都认为是用户的
            if (fileName.find("/Applications/Xcode.app") == 0) {
                return false;
            }
            return true;
        }

    public:

        //必须这样隐式的赋值给 引用类型的成员
        MGMatchCallback(CompilerInstance &CI):CI(CI){}

        void run(const MatchFinder::MatchResult &Result) override {
            //通过Result获取到节点
            const ObjCPropertyDecl * propertyDecl = Result.Nodes.getNodeAs<ObjCPropertyDecl>(TAG);
            if (propertyDecl) {
                //打印文件的名称
                string fileName = CI.getSourceManager().getFilename(propertyDecl->getSourceRange().getBegin()).str();

                string typeStr = propertyDecl->getType().getAsString();
                if (isUserSourceCode(fileName)) {
                    cout << "-- 获取到了: " << typeStr << " 属于文件:" << fileName << endl;
                }
            }
        }
    };

    //创建自定义的ASTConsumer  Consumer(消费者)
    class MGConsumer:public ASTConsumer {
    private:
        //ast节点的查找过滤器
        MatchFinder matcher;
        //回调
        MGMatchCallback callback;
    public:

        /*
        MGConsumer(CompilerInstance &CI) : callback(CI) {
            //添加一个MatchFinder
            //绑定ObjCPropertyDecl节点
            //回调在MGMatchCallback里
            matcher.addMatcher(objcPropertyDecl().bind(TAG), &callback);
        }*/

        MGConsumer(CompilerInstance &CI): callback(CI) {
            //添加一个MatchFinder
            //绑定ObjCPropertyDecl节点
            //回调在MGMatchCallback里
            matcher.addMatcher(objcPropertyDecl().bind(TAG), &callback);
        }

        //解析完顶级节点的回调
        //解析完一个顶级的声明就回调一次
        bool HandleTopLevelDecl(DeclGroupRef D) override {
//            cout << "正在解析..." << endl;
            //注意:解析一个节点,matcher就绑定一个
            return true;
        }

        //解析完一个文件的回调
        //整个文件都解析完成的回调
        void HandleTranslationUnit(ASTContext &Ctx) override {
            cout << "文件解析完毕" << endl;
            //解析完毕,将上下文给matcher
            matcher.matchAST(Ctx);
        }
    };

    //==插件入口==
    //继承PluginASTAction 实现我们自定义的Action
    class MGASTAction:public PluginASTAction {
    public:

        bool ParseArgs(const CompilerInstance &CI, const std::vector<std::string> &arg) override {
            return true;
        }


        unique_ptr<ASTConsumer> CreateASTConsumer(CompilerInstance &CI, StringRef InFile) override {

            return unique_ptr<MGConsumer>(new MGConsumer(CI));
        }
    };
}

/*
 注册插件
 第一个参数是插件名称
 第二个参数是参加的描述
 */
static FrontendPluginRegistry::Add<MGPlugin::MGASTAction>MG("MGPlugin","测试插件");
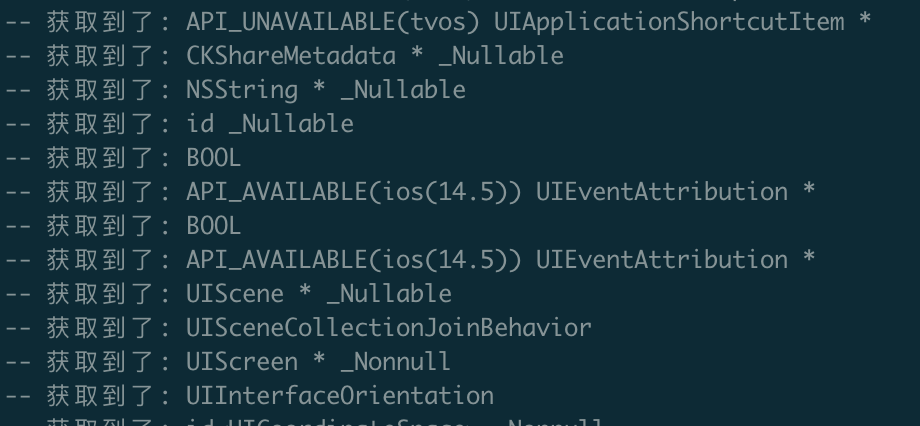
通过CompilerInstance获取文件名称,通过文件名称是否包含"/Applications/Xcode.app"来判断是否用户文件,执行命令:
/llvm_project/llvm-project/build_xcode/Debug/bin/clang -isysroot /Applications/Xcode.app/Contents/Developer/Platforms/iPhoneSimulator.platform/Developer/SDKs/iPhoneSimulator16.0.sdk/ -Xclang -load -Xclang /llvm-project/build_xcode/Debug/lib/MGPlugin.dylib -Xclang -add-plugin -Xclang MGPlugin -c ViewController.m
最终打印如下:

5、找到属性的修饰
- 先给ViewController增加点属性
@interface ViewController ()

@property (nonatomic, copy) NSString *test;
@property (nonatomic, strong) NSString *mgName;
@property (nonatomic, strong) NSArray *mgArray;

@end
- 然后增加判断数据类型的函数
//判断是否应该用copy修饰
bool isShouldUseCopy(const string typeStr) {
       if (typeStr.find("NSString") != string::npos
             || typeStr.find("NSArray") != string::npos
             || typeStr.find("NSDictionary") != string::npos ) {
            return true;
        }
    return false;
}
- 接着拿到节点描述信息
//必须这样隐式的赋值给 引用类型的成员
MGMatchCallback(CompilerInstance &CI):CI(CI){}
void run(const MatchFinder::MatchResult &Result) override {
//通过Result获取到节点
const ObjCPropertyDecl * propertyDecl = Result.Nodes.getNodeAs<ObjCPropertyDecl>(TAG);
if (propertyDecl) {
//打印文件的名称
string fileName = CI.getSourceManager().getFilename(propertyDecl->getSourceRange().getBegin()).str();
//拿到节点数据类型
string typeStr = propertyDecl->getType().getAsString();
if (isUserSourceCode(fileName)) {
//拿到节点的描述信息
ObjCPropertyAttribute::Kind kind = propertyDecl->getPropertyAttributes();
//判断应该使用copy但是没有使用copy
if (isShouldUseCopy(typeStr) && !(kind & ObjCPropertyAttribute::kind_copy) ) {
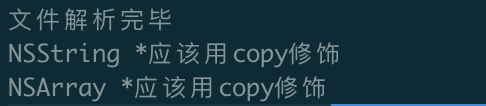
cout << typeStr << "应该用copy修饰,但是没有" << endl;
}
}
}
}
};
执行命令,打印如下:
6、发出警告信息
还是要通过CompilerInstance编译器实例来做。
//诊断引擎
DiagnosticsEngine &diag = CI.getDiagnostics();
//Report报告
//propertyDecl->getBeginLoc() 开始的位置
diag.Report(propertyDecl->getBeginLoc(),
//第一个参数等级 第二个参数内容
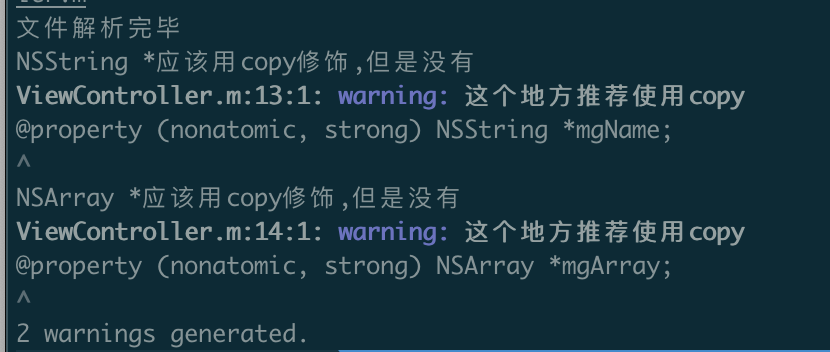
diag.getCustomDiagID(DiagnosticsEngine::Warning, "这个地方推荐使用copy"));
打印:
五、Xcode集成自定义插件
1、集成方式
打开Xcode项目,进入Build Setting,找到Other C Flag,添加如下配置:
-Xclang -load -Xclang (.dylib)动态库路径 -Xclang -add-plugin -Xclang MGPlugin
此时运行,会报错:
error: unable to load plugin '/xxxxx/llvm-project/build_xcode/Debug/lib/MGPlugin.dylib': 'dlopen(/xxxxx/llvm-project/build_xcode/Debug/lib/MGPlugin.dylib, 0x0009): symbol not found in flat namespace
Command CompileC failed with a nonzero exit code
错误原因是:我们下载的clang和Xcode的自带的clang版本不一定匹配,所以造成报错。
2、错误解决
Add User-Defined Setting 中添加 :
(1)CC - 我们自己的clang绝对路径
(2)CXX - 我们自己的clang++绝对路径

此时Xcode就会使用我们自定义的clang。
再次运行,又报错:
clang: error: unknown argument: '-index-store-path'
clang: error: cannot specify -o when generating multiple output files
最后在Build Settings中搜索index,将Enable Index-While-Building Functionality 改为NO.